Here at PageHoot, we found that Facebook ads are a great way to reach a very targeted audience and get good reach for a reasonable price.
Many small businesses are also interested in creating ads on Facebook, but sometimes don’t know where to start beyond boosting a post (which Facebook is always recommending ?).Here is our straightforward guide to getting an ad set up on Facebook quickly so you can start testing results and generating traffic.
Step One: Setup
For this you need to make sure you have a personal Facebook Account and a Facebook Page for your Business
Here are the steps to set up a Facebook Page
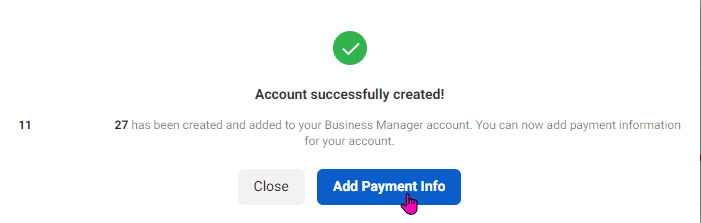
Next, you’ll want to create a Business Manager account. This allows you to manage the information for your business on Facebook and Instagram, connect the two accounts, allow others to edit your assets, and set up payment and account information.
Here are the steps to set up a Business Manager account
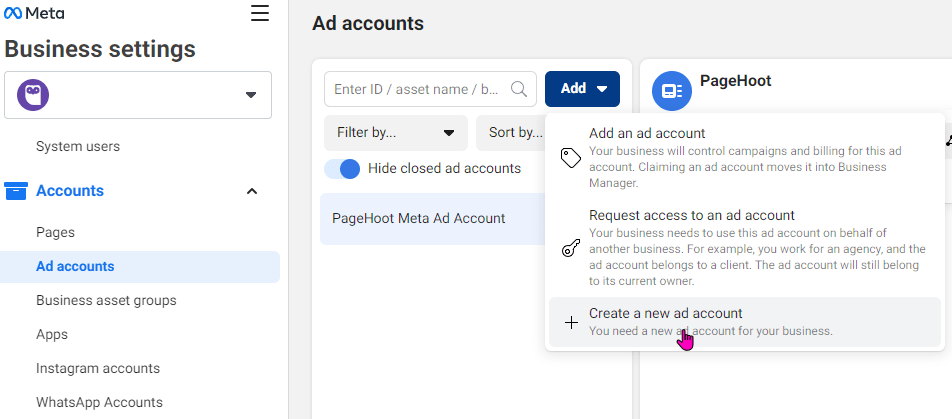
Now’s the time to set up your Ad Account by going to your business settings at business.facebook.com/settings > Accounts > Ad accounts > Add New
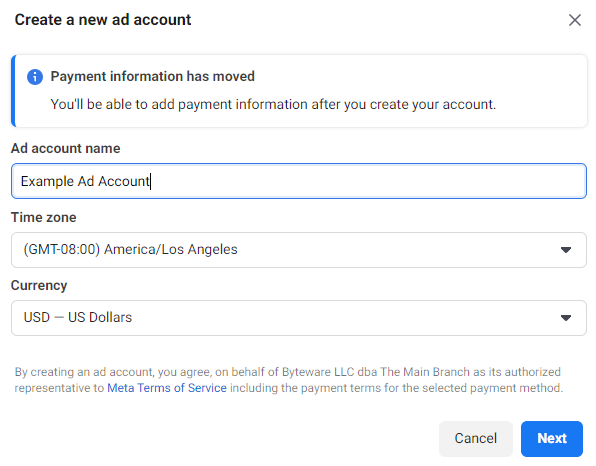
You can call the Ad Account whatever you’d like, but tying it the name of your business or the purpose of your advertising is recommended.
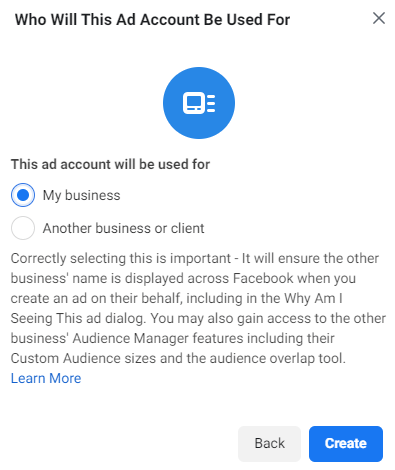
When promoted “Who Will This Ad Account Be Used For,” you’ll want to select “My business” from the list. The other option is mostly for advertising agencies.
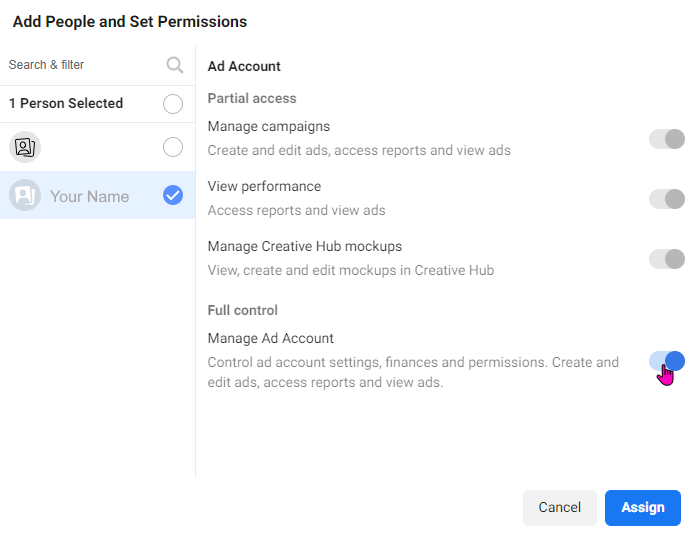
Facebook manages everything for your business using permissions on Business Manager. To enable your ad account, you’ll next be prompted to assign permissions. Here, you’ll want to assign yourself the permissions for full control by ticking “Manage Ad Account.” This step may or may not appear depending on the number of users and other factors.
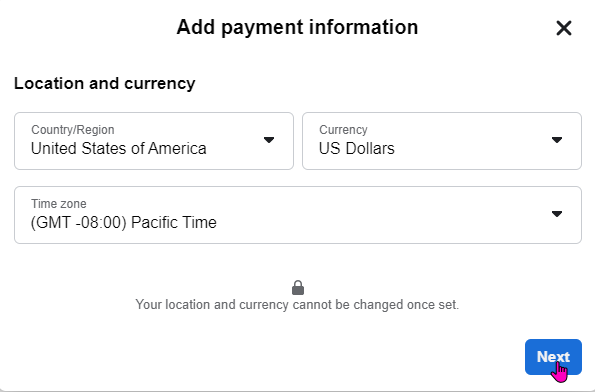
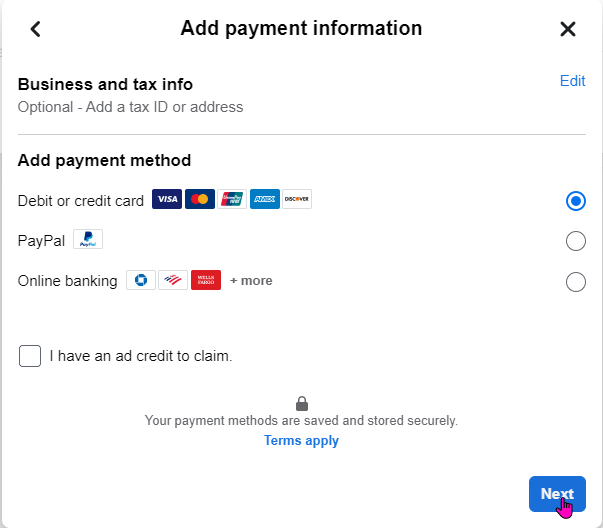
Next, you’ll be prompted to enter your Payment Information
To set up your payment method simply walk through the Facebook steps. There are a variety of payment methods to choose from including credit cards, online banking, and PayPal. As you accrue advertising costs, Facebook will begin charging a number of small charges as you build up costs ($2, $5, etc…).
Here you can also add more business information if you haven’t already.
Step Two: Building Your Ad
To get started creating your first advertisement, go to business.facebook.com, select your Page, and click on Ads. Select “Get Started” to create your first advertisement.
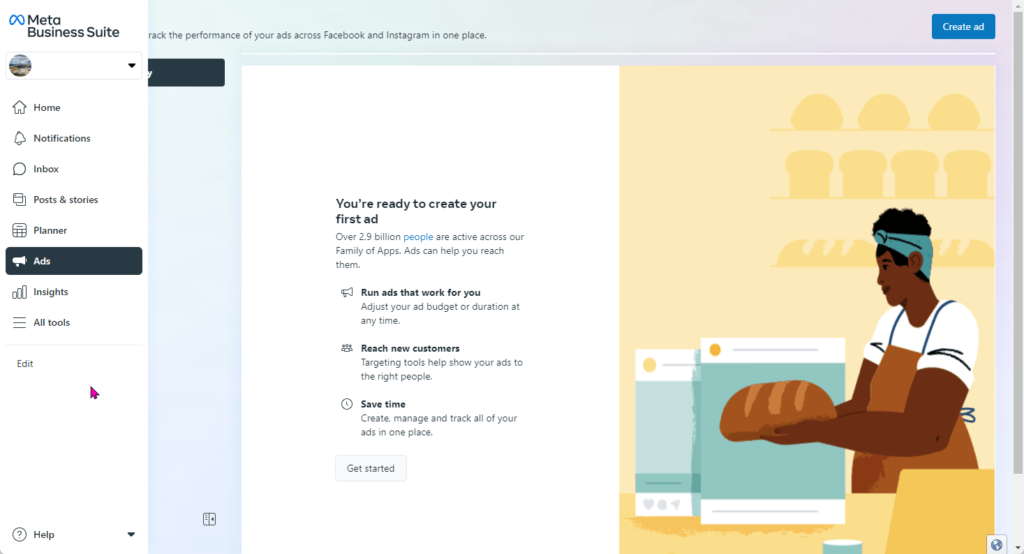
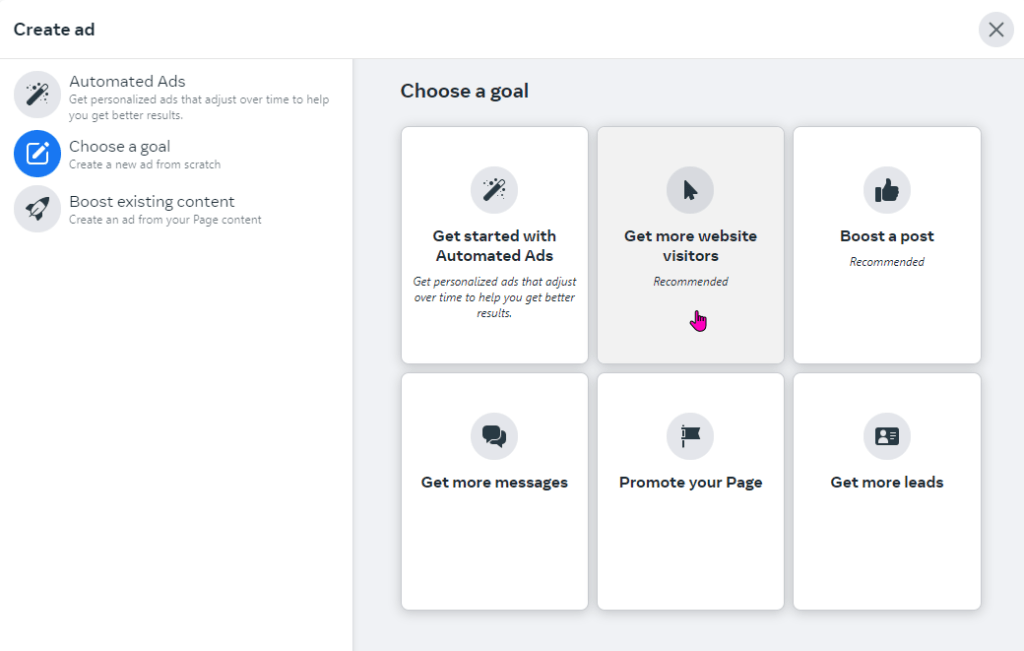
Facebook offers a number of goals for your ads. You should select the goal that corresponds closest to your business goal. In this example, we’re going to choose “Get more website visitors” so that users clicking on our ads will land on our webpage.
Here we will begin to set up your ad. There are a variety of options and this versatility is what makes Facebook such a useful advertising tool.
Let’s walk through your options, though it is quite a bit, they’re all pretty straightforward:
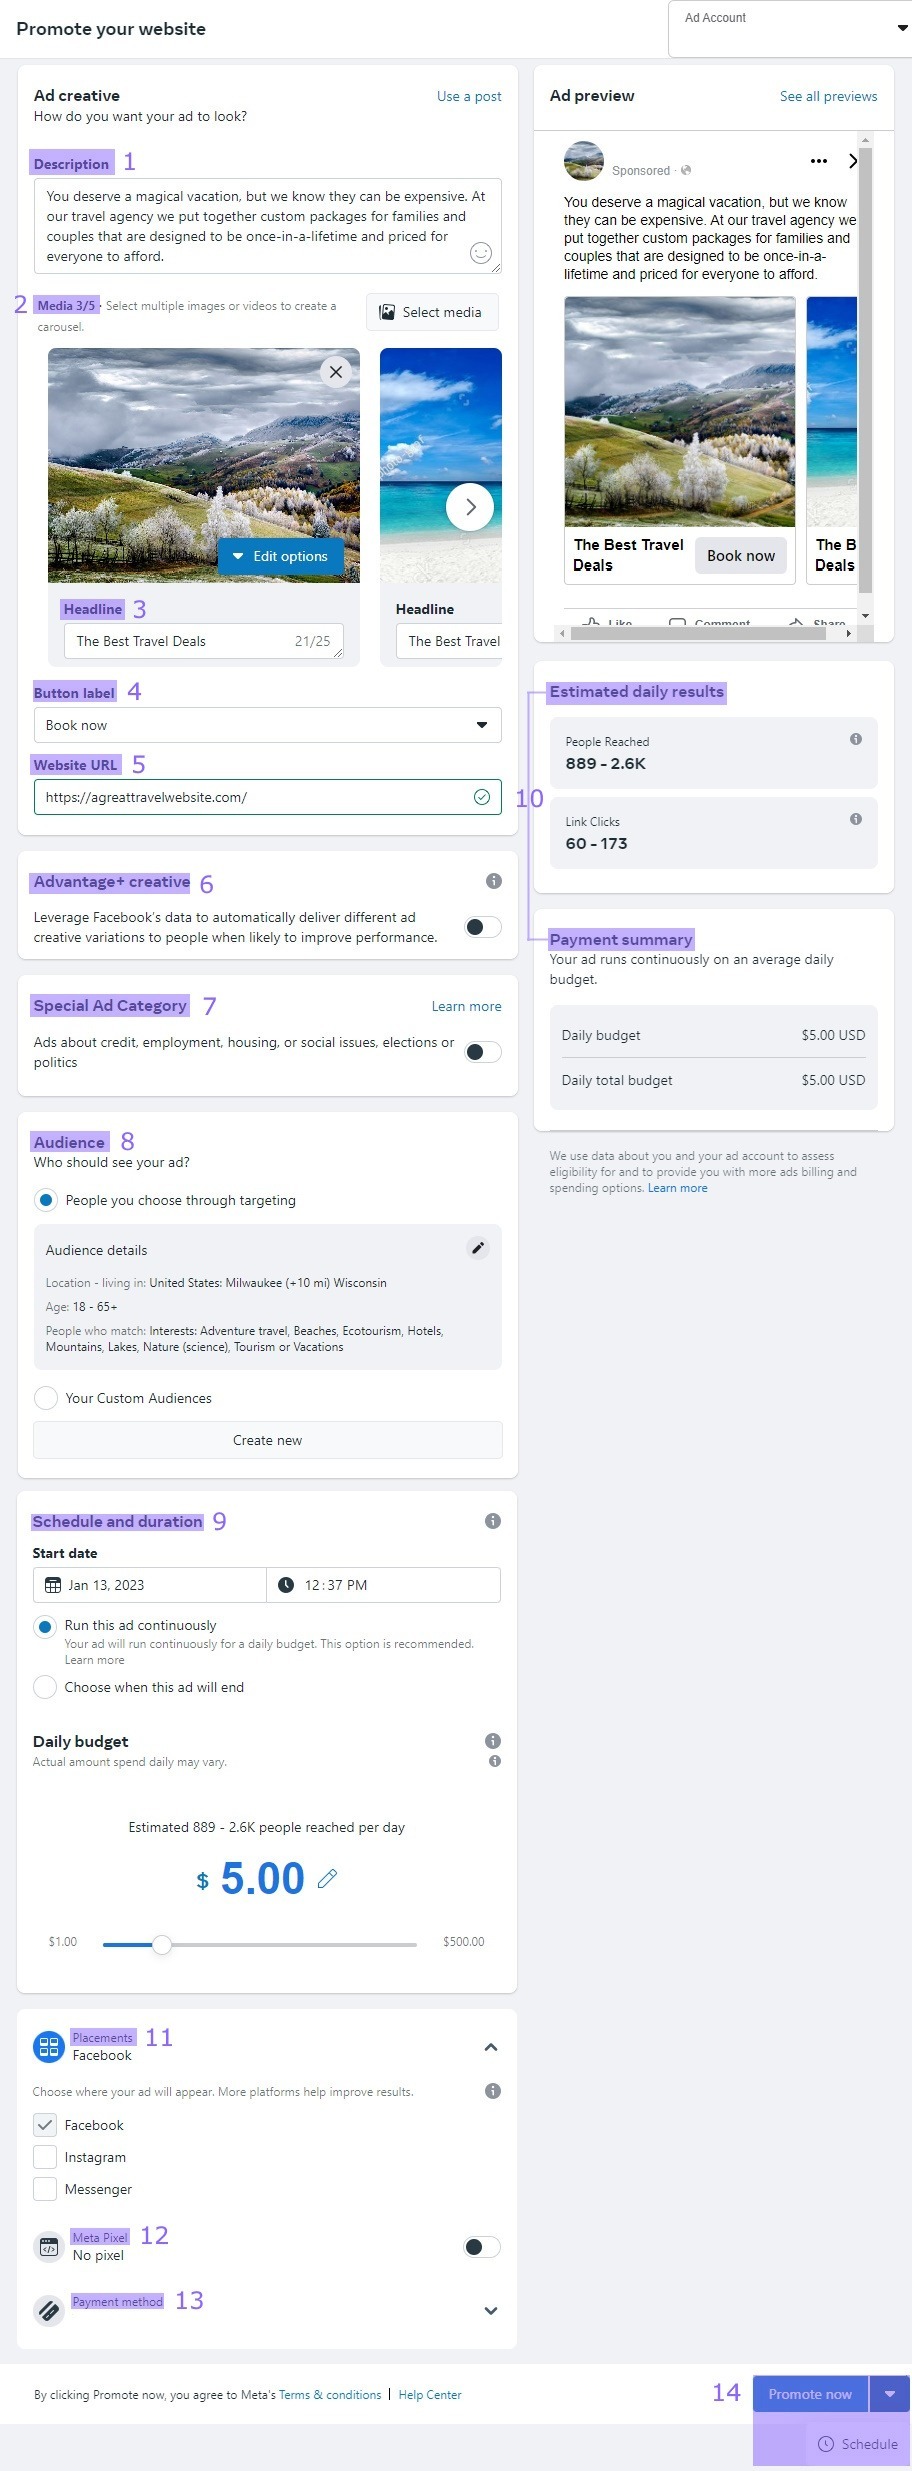
1) Description
The description is the main text of your post that appears before any pictures, video, or links, like a normal Facebook post. Depending on where the posts show up, text in your ad may be shortened. The recommended text length for most placements is 125 characters, but it can be as long as you would like or need to be effective.
2) Media
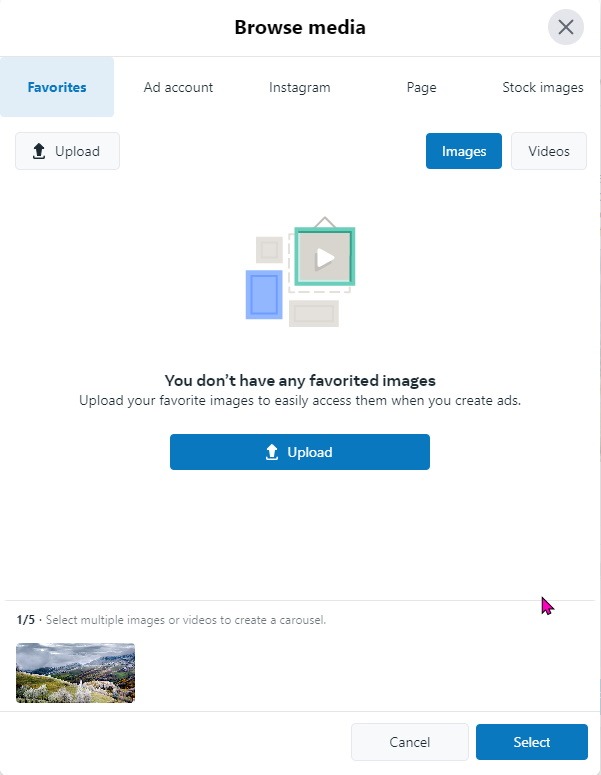
The next step is to select the ad creative you would like to use by clicking on Select Media. Here you can upload photos or videos you have previously prepared using the upload feature.
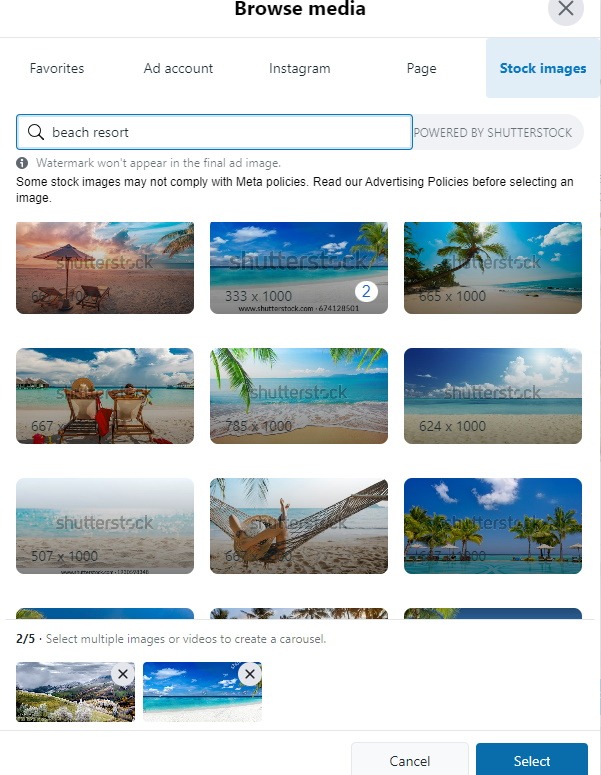
Alternatively, you can choose some appropriate pictures using Stock Images, or posts you’ve already made on Facebook or Instagram. Since, in our example, we’re setting up an ad for an imaginary vacation company, we’re going to focus on some captivating beach resort photos.
3) Headline
The headline is the text that appears below your media. Typically, this is used to backup the main idea from your description text or to reinforce your offer. 40 characters is recommended as the limit for the Headline field.
4) Button Label / Call to Action
This is a dropdown box that allows you to select from a predefined list of calls to action that includes things like Book Now, which is great for our vacation site.
5) Website URL
Here you should enter the URL of the landing page you would like people to click. Facebook will only display the first part of your URL. So if you enter “https://agreattravelwebsite.com/landingpage1” your ad will only display “agreattravelwebsite.com”
6) Advantage+ Creative
This is the AI optimization feature in Facebook Ads that allows the platform to test various combinations of your ads’ images/videos, descriptions, and headlines, in order to find the best performing version. This can help to lower costs, but it’s not a guarantee. It’s suggested to experiment with this feature and track the results over time to see if Facebook’s AI is beneficial for your specific campaigns.
7) Special Ad Category
If your ad is about electoral or political issues, employment, real estate and housing, or credit and loans, the platform places additional restrictions on targeting depending on your region. There are also additional requirements for advertisers themselves in these categories, which is beyond the scope of this article, but it is important to check the right category if it applies to your industry.
8) Audience
Here’s where the real value of the Facebook platform comes to life. Audience targeting includes a variety of options to make sure that your ads are seen by the right people. There are a variety of options to create and refine your audience.
Gender
Three options here
Age
Here you can select an age range. No one lower than 13 may be selected and 65 includes 65 and older.
Location
Location targeting, also known as geotargeting, allows you to select a zone in which your ads will be shown. This can be very specific. For example, you can select individual zip codes. You can also select wide areas like countries, cities, and designated market areas (DMA) for TV and radio markets.
Most targeting works with a radius around a specific point, the minimum of which is 10 miles.
In our example, we’re selecting an audience made up of folks within a 10 mile radius of Milwaukee, Wisconsin.
More advanced location targeting, like excluding areas, is out of the scope of this article, however, the geotargeting tool contains a wide range of functionality.

Detailed: Demographics / Interests / Behaviors
This section includes a number of pre-populated lists and audiences generated by users’ online behavior and demographic information. Demographics target who they are (e.g. income, education), Interests target what they’ve liked and shown interest in online as pre-set topics, and Behavior deals with purchase behavior or intent (like whether they have an upcoming anniversary). Depending on what you’re advertising, you may have a good idea of which audience should see your ad.
In our example, we’re targeting a group with Interests that include Travel and Tourism specific to Adventure Travel, Beaches, Ecotourism, Hotels, Lakes, Mountains, Nature, Vacations, and Travel. This will limit our audience to people in Milwaukee who have expressed interest in these topics based on their likes and interactions on Facebook platforms.
In general, it’s a good practice to experiment with targeting over the course of an advertising campaign so you’re working to find the most effective audience.
9) Schedule and Duration
Here you can select a start and end date for your campaign, or choose to run your campaign until you manually pause it. You can also set your budget. Facebook will optimize your budget and will almost always succeed in spending your full budget per day to reach the highest possible number of people in your audience. It’s generally a good idea to start small and ramp up when you find success.
10) Estimated Daily Results and Cost
In this section, Facebook will attempt to estimate the number of people and clicks you can anticipate every day. This is dependent on the size of your audience. The more targeted you are, generally the more expensive your clicks will be.
11) Placements
Here you can decide where you’d like your ads to run. Sometimes ads designed for Facebook won’t perform as well on Instagram, and vice versa. Keep track of your ads’ performance to keep your spending efficient.
12) Meta Pixel
The Meta pixel is a snippet of code that you can put on your website to track when people who click on your ad from Facebook take an action, like filling out a form. This is advanced for this article, but recommended to increase efficiency in the long term.
13) Payment Method
This was covered in Step One of the article, and is how Facebook will charge you for your advertising.
14) Promote/Schedule
Hitting promotion will start your ad based on your schedule information. You can also choose to schedule your ad to run like a normal Facebook post.
Next Steps
Launch your ad and monitor its performance by analyzing metrics such as reach, click-through rate, and more. For future ad oversight and analytics you can use the Facebook Ad Manager, which has an overwhelming array of options, but for ad creation, includes the same basic steps we outlined today.
Additionally, the Facebook Business Manager has a section on ads that gives a more general performance overview.
Moving ahead, you’ll want to optimize your ad by making changes based on the performance data you collect over time, and test different versions of the ad to find the best performing creative and audience.
The name of the game with online advertising is experimentation. If one ad isn’t working, try changing up your images, videos, or the audience you’re targeting. Facebook ads can be very effective and it’s always worth trying them out and learning more.
As always, a great ad is only as strong as the great website it’s linking to. In order to ensure that you keep customers engaged, reach out to a PageHoot designer to make sure your custom website is unique and stands apart from the rest.
Feel free to check out some of our other relevant articles as well: